
How to Take a Professional Headshot: The Complete Guide (DIY, Pro, and AI)
This article is part of our Professional Headshots collection.
Why Does Your Headshot Actually Matter?
A solid headshot is the single fastest way to build trust online before anyone reads a word you've written. It's the tiny square that shows up on LinkedIn, your company's About page, Slack, Zoom -- everywhere. And people form an opinion in about a tenth of a second.
I've shot thousands of headshots over the years, and the pattern is always the same: the person with the polished photo gets the callback, the connection request, the "you look like someone I'd want to work with." The person with the cropped vacation selfie? Not so much.
Whether you're job hunting, building a consulting practice, or just tired of that blurry photo from 2018, this guide walks you through everything -- gear, lighting, backgrounds, what to wear, how to pose, camera settings, and your three main options: doing it yourself, hiring a photographer, or using AI.
Let's get into it.
What's the Difference Between a Professional Headshot and a Selfie?
The difference comes down to three things: lighting, framing, and intention. A selfie is whatever your front camera catches at arm's length. A professional headshot is deliberately lit, properly framed, and designed to make you look competent and approachable.
Here's what separates the two:
- Lighting: Professional headshots use controlled lighting (natural or artificial) to eliminate harsh shadows and evenly illuminate your face. Selfies rely on whatever ambient light is around.
- Framing: A headshot is cropped from mid-chest up, with your eyes roughly one-third from the top of the frame. Selfies are usually too close, from a weird angle, or include your bathroom mirror.
- Background: Clean, uncluttered backgrounds that don't compete with your face. No beach umbrellas, no messy kitchens.
- Expression: A natural, relaxed look -- not the "I'm trying to look casual but I'm actually holding my phone at a strange angle" face.
A strong first impression on platforms like LinkedIn can open doors you didn't even know existed. Your headshot is doing that work 24/7.
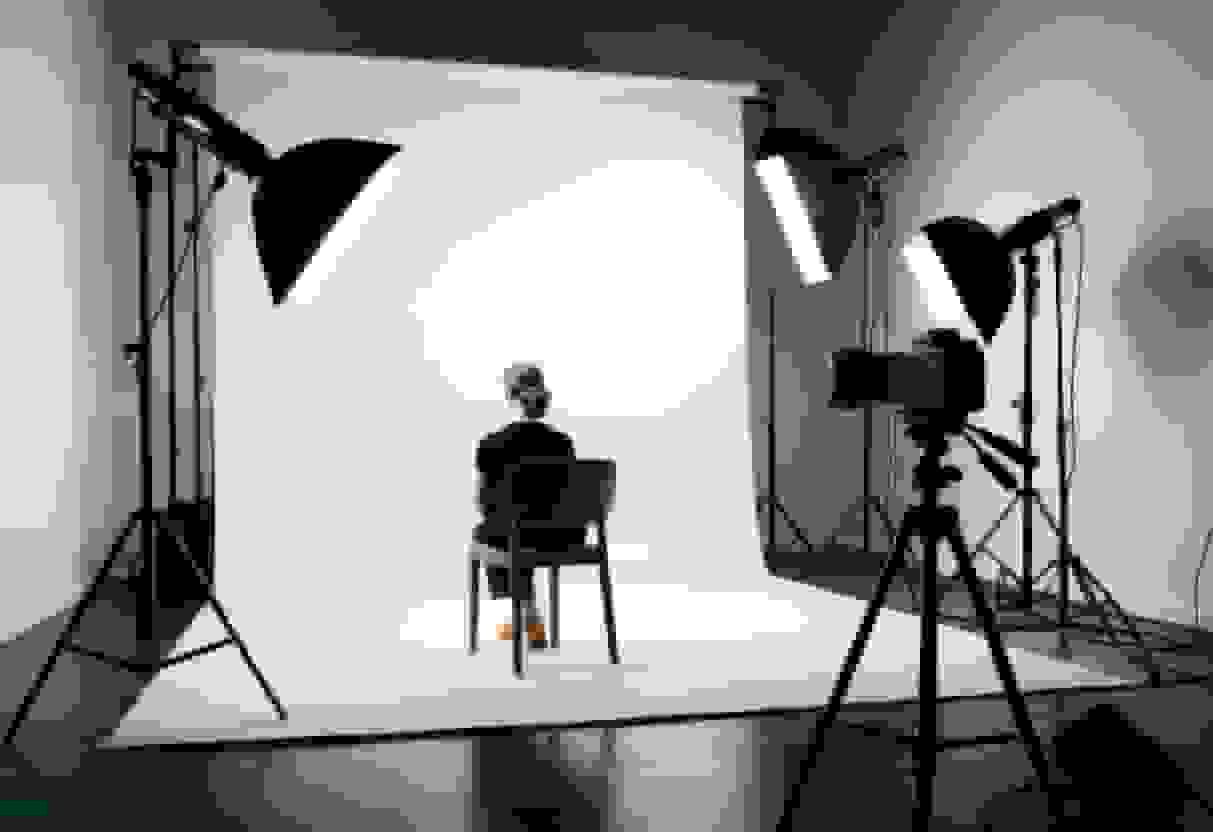
Do You Actually Need a Professional Photographer?
Not necessarily. You have three real options, and each one has tradeoffs. I'll break down DIY, hiring a pro, and using AI headshot tools later in this guide. But first, let's cover the fundamentals that apply no matter which route you pick.
What Equipment Do You Need for a Professional Headshot?
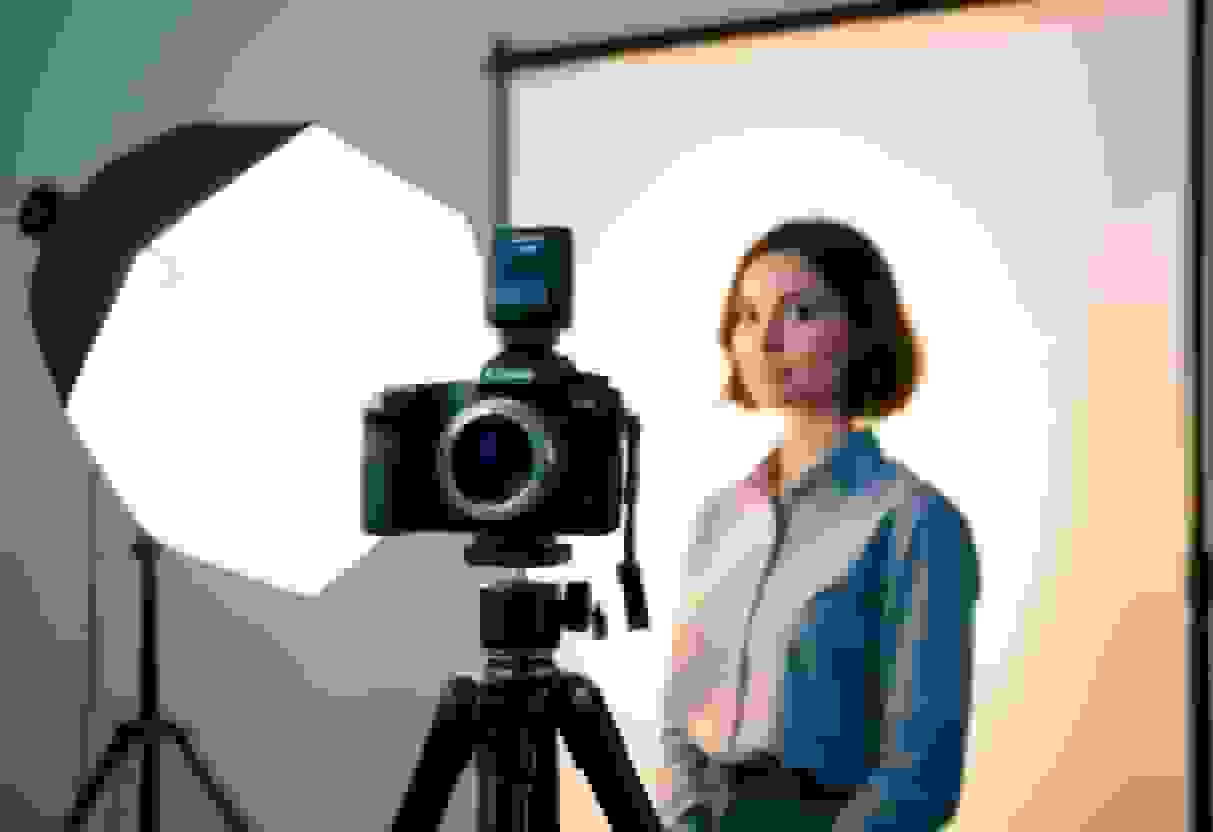
You don't need a $3,000 camera to get a great headshot -- but a few basic tools make a massive difference. Here's what actually matters when you're creating a professional headshot.
What's the Best Camera for Headshots?
For the absolute best results, a DSLR or mirrorless camera with a portrait lens (something in the 50mm to 85mm range) is hard to beat. These cameras give you full control over depth of field, exposure, and focus.
But here's the honest truth: a modern smartphone can get you 80% of the way there. The rear camera on any recent iPhone or Samsung flagship shoots at high enough resolution. Use Portrait Mode to get that nice background blur.
What matters more than the camera:
- Use the rear camera, not the front-facing one. The rear camera has a much better sensor.
- Shoot at the highest resolution your device supports.
- Clean the lens. Seriously. A smudgy lens is the number one killer of otherwise-decent phone headshots.
If you're shopping for a dedicated camera and budget is tight, a used Canon EOS Rebel or Sony Alpha a6000 series will do the job beautifully.
Why Your Lens Is More Important Than Your Camera
If you're going the DSLR or mirrorless route, the lens you choose makes a massive difference. Using a wide-angle lens—like the one on the front of your phone for selfies—is a classic mistake. It distorts facial features, making your nose look bigger and your face wider. It's just not a flattering look.
For headshots, photographers gravitate toward focal lengths that compress the scene, making facial features look more natural and proportionate.
- 50mm Lens: This is the workhorse of the photography world. Often called the "nifty fifty," it’s an affordable and fantastic starting point that gives you a natural field of view without any weird distortion.
- 85mm Lens: The quintessential portrait lens. An 85mm lets you stand a bit further back from your subject, which often feels more comfortable for them, and it produces absolutely gorgeous background compression and creamy bokeh.
Pro Tip: Stuck with the 18-55mm "kit lens" that came with your camera? No problem. Just zoom it all the way in to 55mm. This will mimic the flattering compression of a dedicated portrait lens and instantly improve your shots.
Why Is a Tripod Non-Negotiable?
A stable tripod eliminates camera shake, which is the enemy of sharp photos. Even tiny hand movements create subtle blur that makes a headshot look amateur.
A few tripod tips:
- Set the camera at eye level. Shooting from below makes people look imposing; from above, it shrinks them. Eye level is the sweet spot.
- You don't need anything fancy. A $25 tripod with a phone adapter works fine for DIY headshots.
- If you're using a phone, get a tripod with a phone mount rather than trying to prop your phone against a stack of books (we've all been there).
How Do You Take a Headshot Without Help?
Use a remote shutter or your camera's self-timer. This lets you get into position, check your posture, relax your face, and then trigger the shot without rushing.
Most smartphones have a built-in timer (usually 3 or 10 seconds). Set it to 10 seconds so you have time to:
- Tap the shutter button
- Walk to your mark
- Check your posture
- Settle your expression
- Take a breath before the shutter fires
Bluetooth remotes cost about $10 and are worth every penny. They let you take dozens of shots in different poses without walking back and forth.
Practice different poses before you start shooting for real. Try slight head tilts, a genuine smile versus a neutral expression, angling your shoulders. The more shots you take, the better your odds of landing one you actually like.
How Should You Set Up for the Shoot?
What's the Best Background for a Professional Headshot?
Keep it simple. A clean, uncluttered background keeps the focus where it belongs: on your face.
Good background options:
- Solid-colored walls: White, light gray, soft blue, or warm beige all work well
- Natural settings: An outdoor wall, a park with soft greenery blurred behind you
- Textured surfaces: Exposed brick or a wooden wall can add personality without being distracting
- Stand a few feet away from the wall to create separation. This adds a sense of depth and prevents you from casting a sharp shadow right behind your head.
Things to avoid:
- Busy patterns, posters, or shelves full of stuff behind you
- Bright or neon colors that pull attention away from your face
- Other people wandering through the frame
Match your background to your outfit. Dark clothes against a light background (or vice versa) creates contrast that makes you pop. If you're wearing a navy blazer, a light gray wall is perfect. More on choosing the right background for your personal brand here.
How Do You Get the Lighting Right?
Lighting makes or breaks your headshot -- and natural light is your best friend when you're doing it yourself.
Here's the simplest setup that works:
- Find a large window with indirect light (no direct sunbeams hitting your face)
- Face the window by default for an even, corporate look, or angle yourself roughly 45 degrees to the window for more shaping and dimension
- Shoot during overcast days or golden hour (the hour after sunrise or before sunset) for the most flattering, warm light
First things first, find the largest window in your home that isn't getting hit with direct sunlight. North-facing windows are the gold standard because they provide beautifully consistent, soft light all day long. If all you have are south-facing windows, no problem. Just wait for a slightly overcast day or shoot when the sun isn't directly hitting the glass, like in the mid-morning or late afternoon.
If you need to shoot with artificial light:
- Prefer window light when it's available. If daylight isn't an option, softbox lights or a ring light can diffuse artificial light and reduce harsh shadows
When daylight is unavailable and a ring light is your fallback:
- Raise the ring light slightly above eye level and angle it downward to create more natural shadows
- Always use its diffuser cover to soften glare
- Start at a low brightness, then dial it up gradually so you light your face without blowing out the highlights
- Position the light at a 45-degree angle to your face, slightly above eye level
- Use a second light or a white foam board on the opposite side to fill in shadows
A low-power hair light placed behind and above you can add a subtle rim that separates you from the background.
Creating a Simple DIY Studio Setup
What if it’s dark out or you just don't have good natural light? No worries. You can easily create a versatile lighting setup with lamps you already own. The goal is to mimic that soft, directional light you’d get from a window. The key is a basic two-light setup.
Your main light source is called the key light. This should be your brightest light. Place a lamp about 45 degrees to one side of you and position it slightly above eye level. Placing it directly in front of you can flatten your features, so an angle is always better. If the light is too harsh, you can soften it by shining it through a thin white bedsheet or bouncing it off a nearby white wall.
Next, you'll want a fill light. This one is less intense and goes on the opposite side of the key light. Its only job is to "fill in" and soften the shadows created by your main light, making sure your whole face is visible and well-lit. A smaller lamp, or even the same type of lamp moved further away, will do the trick.
"Pro Tip: Whatever you do, avoid using the overhead ceiling light in your room. This is what photographers call "monster lighting" because it comes from directly above, creating nasty, unflattering shadows under your eyes, nose, and chin. Always turn it off and stick with your window or DIY lamp setup instead."
The goal is to create soft shadows, not get rid of them. Shadows are what give your face dimension and shape. A classic portrait technique is called Rembrandt lighting, where a little triangle of light appears on the cheek that's further from the light source. It's a hallmark of professional photography and surprisingly easy to achieve with just one window.
What to avoid:
- Overhead lighting (like ceiling fixtures) -- it creates dark shadows under your eyes and nose
- Harsh midday sun -- it makes everyone squint and creates unflattering contrast
- Mixed lighting (half window light, half fluorescent) -- it creates weird color casts
Take a few test shots and check them on your phone or camera screen before committing to a full session. Adjust the angle of the light or your position until the shadows look soft and even.
How Do You Frame and Compose the Shot?
Use the rule of thirds: imagine your frame divided into a 3x3 grid. Place your eyes along the top horizontal line, slightly off-center. This creates a more natural, engaging composition than dead-center framing.
Key framing guidelines:
- Crop from mid-chest up -- this is the standard headshot frame
- Leave some breathing room above your head (don't crop the top of your skull)
- Keep your shoulders in the frame -- they ground the image and show your outfit
- Shoot slightly wider than you think you need -- you can always crop tighter later, but you can't add pixels back
What Camera Settings Should You Use?
If your camera lets you control settings manually, these are the numbers that matter for headshots.
What Are the Best Manual Settings for Headshots?
- Aperture (f-stop): Set between f/2.8 and f/5.6. A wider aperture (lower number) blurs the background more, drawing attention to your face. f/4 is a great all-around choice.
- ISO: Keep it as low as possible -- 100 to 400. Lower ISO means less grain/noise and a cleaner image.
- Shutter speed: At least 1/125 second. Faster if you're shooting handheld or your subject tends to move.
- Focus: Lock focus on the eyes. Always the eyes. If your camera has eye-detect autofocus, turn it on.
- Shooting Mode: Pop your camera into Aperture Priority mode (labeled A or Av). This is a game-changer. You pick the aperture you want, and the camera intelligently figures out the best shutter speed for you.
- Focus is Everything: Use single-point autofocus and place that little focus square directly on the eye closest to the camera. Sharp eyes are what make a headshot compelling.
- File Format: If you plan on doing any editing later (and you should), shoot in RAW. RAW files are packed with so much more image data than JPEGs, giving you way more freedom to make adjustments in post-production.
What If You're Using a Smartphone?
Most of the heavy lifting is automatic, but you can still optimize:
- Turn on Portrait Mode for background blur
- Tap your face on the screen to lock focus and exposure
- Bump up the exposure slightly (swipe up on iPhone after tapping to focus) -- slightly brighter usually looks more flattering than slightly darker
- Shoot in the highest quality setting your phone offers
- Turn off the flash. Always. Built-in flash creates harsh, flat, unflattering light.
How Do You Get the Exposure Right?
The goal is even, balanced light across your face with no blown-out highlights or dark shadows.
- If you're in manual mode, check the histogram on your camera -- you want the graph to be a smooth hill mostly in the middle, not spiked at either edge
- Slightly overexpose rather than underexpose -- it's easier to darken a bright image than rescue a dark one
- Take a test shot, check it, and adjust before shooting the full session
What Our Data Shows About At-Home Headshots
A significant portion of BetterPic users take their source photos at home. Here is what drives the best results:
- Window light outperforms ring lights for AI headshot source photos. Users who submit photos taken near a window produce AI headshots that score 19% higher on our quality metrics than those using ring lights or overhead fixtures.
- Plain walls beat busy backgrounds in source photos. Even though our AI replaces the background, starting with a clean backdrop helps the AI isolate facial features more accurately, resulting in fewer artifacts.
- Phone cameras from 2022 or later produce sufficient quality. We see no meaningful difference in AI output quality between flagship phone cameras and mid-range models from the last 3 years. The limiting factor is almost always lighting, not camera hardware.
- The most common mistake in at-home photos is shooting from too far away. 34% of rejected uploads are flagged for being too far from the subject. Use chest-up framing at arm's length for most uploads, while still including the required half-body images.
- Natural daylight between 10 AM and 2 PM produces the best source photos. This means soft indoor daylight through a window, not direct midday sun outdoors. Users who shoot during this window report 22% higher satisfaction with their final AI headshots.
- Solid-color shirts outperform patterns for source photos. While our AI can generate any outfit, the initial face-matching accuracy improves when source photos feature simple, non-distracting clothing.
- Smartphone front cameras are sufficient for AI source photos. 78% of our users upload selfies taken with front-facing cameras, and there is no statistically significant quality difference compared with rear-camera source uploads when lighting is adequate. For a photo you intend to publish directly, the rear camera still wins because its sensor is better.
- Wildly mismatched lighting conditions across uploads undermine cohesion. Users who maintain consistent lighting quality while varying their environments get more cohesive results than those who mix harsh, dim, and differently colored light.
For AI source uploads, follow the full photo requirements: submit a minimum of 6-7 chest-up photos plus 1-2 half-body images, vary the environments and facial expressions, and use no glasses or hats and no repetitive angles or poses. Following these requirements affects both the quality of your results and your refund eligibility.
What Should You Wear for a Professional Headshot?
Wear solid colors that you feel good in. That's the short version. Here's the longer version:
Clothing Do's
- Solid, muted colors: Navy, charcoal, deep green, burgundy, white, and medium blue all photograph well
- Well-fitted clothes: Nothing too baggy or too tight -- your outfit should look intentional
- Layers add dimension: A blazer over a shirt, a cardigan, or a scarf gives the photo visual interest
- Match your industry: Finance and law? Suit jacket. Creative field? Something with more personality. Tech? A clean, solid-colored shirt works great.
- Iron or steam everything the night before -- wrinkles are distracting and hard to edit out
Clothing Don'ts
- Busy patterns: Stripes, plaid, and small repeating patterns can create a visual "buzzing" effect on camera (called moire)
- Logos and graphics: They pull attention away from your face and can look unprofessional
- Neon or very bright colors: They reflect onto your skin and create color casts
- Low necklines: Keep it professional unless your industry specifically calls for something different
- Colors that match your skin tone or the background: You don't want to look washed out or like a floating head.
How Should You Pose for a Headshot?
The best headshot pose looks natural, and "natural" takes practice. Here's what works based on thousands of sessions:
Body Position
- Angle your body about 30-45 degrees away from the camera, then turn your head back toward the lens. This is more flattering than facing the camera square-on.
- Push your chin slightly forward and down. This defines your jawline and avoids the double-chin effect. It feels weird but looks great.
- Drop your shoulders. Everyone tenses up in front of a camera. Take a breath, let them fall.
Play around with which shoulder you lead with. Most of us have a "good side" we subconsciously prefer, so take shots with both your right and left shoulders angled toward the camera. You'll quickly see what feels and looks most natural for you.
"The Turtle Technique": It sounds strange, but hear me out. Imagine a string is pulling the crown of your head upward, elongating your neck. Then, push your forehead forward just an inch or two. This small adjustment tightens the skin under your jaw, gets rid of unflattering shadows, and creates a clean, confident profile. Trust me on this one.
What to Do with Your Hands
- Crossed Arms: It's a classic for a reason. This pose signals confidence and authority. The key is to keep your shoulders relaxed so you don't look defensive.
- One Hand in a Pocket: This is my personal favorite for a casual yet professional feel. It's an easy way to look composed without coming across as stiff.
- Leaning Slightly: A subtle lean forward from your hips toward the camera creates a sense of engagement. It’s a small move that makes you seem more connected to the person looking at the photo.
Expression
- Think of someone you genuinely like. This produces a more authentic, warm expression than forcing a smile.
- A slight smile with relaxed eyes reads as confident and approachable. You don't need to show teeth unless that's your natural smile.
- Avoid the "dead eyes" problem by thinking about something that actually makes you happy right before the shot.
- For a confident smile: Picture yourself closing a huge deal or getting a major compliment from your boss.
- For an approachable look: Imagine you’re about to greet a friendly colleague you haven't seen in a while.
- For a thoughtful expression: Think about a complex problem you recently managed to solve.
The single most important part of a great headshot is a genuine expression. A forced smile is painfully obvious and can make you seem insincere. The secret to a real smile isn't in your mouth—it's in your eyes. Photographers call this the "Duchenne smile."
Here's a pro tip: try talking or laughing just before the shutter clicks. Saying a word that ends in an "uh" sound, like "yoga" or "mocha," naturally parts your lips and relaxes your jaw. It leads to a much more natural expression than a forced, toothy grin.
Transitioning Between Poses
- Make small adjustments between shots: tilt your head slightly, shift your weight, try a different smile
- Keep your eyes engaged with the lens -- it creates connection with whoever is looking at the photo
- Move fluidly rather than resetting your whole body between each shot
And please, don't just take one photo and call it a day. The best way to catch that perfect, unforced moment is to shoot in bursts. Set your camera's self-timer to take a series of 5-10 photos in a row. This gives you time to breathe, relax, and let your expression shift naturally between clicks.
Getting comfortable in front of the camera takes time. Check out these tips for a successful headshot session for more on directing yourself (or working with a photographer).
How Do You Edit a Professional Headshot?
Light editing makes a headshot look polished. Heavy editing makes it look fake. The goal is to enhance, not transform.
What Editing Software Should You Use?
- Adobe Lightroom: Best for overall adjustments -- exposure, white balance, contrast, color correction. It's the industry standard for a reason.
- Photoshop: For targeted retouching -- removing a stray hair, reducing a blemish, smoothing under-eye circles
- Free alternatives: Snapseed (mobile), GIMP (desktop), or Canva's photo editor all handle the basics
What Should You Actually Edit?
Keep it simple:
- Color correction: Make sure your skin tone looks natural, not orange or washed out
- Exposure adjustment: Brighten slightly if needed
- Crop and straighten: Fine-tune your composition
- Light retouching: Remove temporary blemishes (a pimple, a scratch). Leave permanent features alone -- they're part of what makes you look like you.
- Sharpening: A subtle sharpen pass makes your eyes pop
- Background cleanup: Remove distracting elements
What Not to Edit
- Don't smooth your skin into plastic. People will notice.
- Don't whiten your eyes or teeth to an unnatural degree.
- Don't change your face shape, nose, or features. The person in the photo should look like the person who shows up to the meeting.
What Format Should You Export In?
- JPEG at high quality for LinkedIn, websites, and email signatures
- PNG if you need a transparent background
- TIFF for print (business cards, conference badges)
- Save at 300 DPI for print, 72 DPI for web
- Always keep the original file so you can re-edit later
DIY vs. Professional Photographer vs. AI Headshots: Which Should You Choose?
This is the big question. Here's an honest comparison:
DIY vs Professional Studio Headshot Comparison
Deciding between a DIY session and hiring a pro can be tough. Both have their merits, and the best choice really depends on your budget, timeline, and what you need the photo for. Here's a quick breakdown to help you weigh the options.
| Feature | DIY At-Home Headshot | Professional Studio Session |
|---|---|---|
| Cost | Free or very low-cost (using existing gear). | Typically $150-500+, depending on the photographer and package. |
| Convenience | Highly convenient. Shoot anytime you want in the comfort of your own home. | Requires scheduling, travel, and coordinating with the photographer. |
| Control | Full creative control over styling, posing, and the final look. | The photographer directs the shoot, bringing their professional expertise and vision. |
| Equipment & Lighting | Relies on natural light and basic equipment like a phone or consumer camera. | Access to high-end cameras, professional lighting setups, and various backdrops. |
| Expertise & Guidance | You are the photographer, model, and director. Requires some self-awareness and skill. | Benefits from an expert's eye for posing, expression, and technical details. |
| Final Quality | Can be excellent with the right techniques, but may lack that final professional polish. | Consistently high-quality, professionally retouched images are the standard. |
| Best For | Quick updates, budget-conscious professionals, social media profiles, casual branding. | Corporate websites, executive bios, speaking engagements, high-stakes professional use. |
Ultimately, a professional photographer brings years of experience and top-tier gear that's hard to replicate. However, for many situations, a well-executed DIY headshot is more than enough to make a fantastic impression online.
DIY Headshots (Doing It Yourself)
Best for: Tight budgets, quick needs, people who are comfortable in front of a camera
- Cost: $0-50 (tripod + remote)
- Quality: Decent with good light and a clean background, but limited by your self-directing ability
- Time: 30-60 minutes of setup and shooting, plus editing time
- Main drawback: It's really hard to direct yourself. You can't see what the camera sees in real time, so you end up with 200 photos and maybe 3 that work.
Tips for DIY headshots and using a smartphone can help you get the most out of this approach.
Hiring a Professional Photographer
Best for: High-stakes situations (executive team pages, acting/modeling portfolios, speaker bios)
- Cost: $150-500+ per session
- Quality: High -- they handle lighting, direction, and editing
- Time: 1-2 hours including prep, plus a few days for delivery
- Main drawback: Expensive, requires scheduling, and you're dependent on finding a good photographer in your area
A strong corporate headshot from a skilled photographer is hard to beat for executive-level roles. But it's not always practical.
AI Headshots (The BetterPic Approach)
Best for: Anyone who wants studio-quality results without the hassle, cost, or scheduling of a traditional shoot
- Cost: A fraction of what a photographer charges
- Quality: Studio-grade results with professional lighting, backgrounds, and retouching -- all generated from your casual photos
- Time: Upload a few photos and get polished headshots back as fast as about an hour
- Main advantage: No awkward self-directing, no booking a photographer, no commuting to a studio. Just upload and go.
BetterPic uses AI to generate professional headshots that look like they came from a high-end studio session. You upload a handful of everyday photos, and the AI handles lighting, background, outfit adjustments, and retouching. The results genuinely look like you sat for a professional shoot.
It's especially great for:
- Remote teams that need consistent headshots without flying everyone to the same studio
- Job seekers who need a polished headshot fast without spending $300
- Anyone updating their look -- swap backgrounds, outfits, or styles without rebooking a photographer
This is the option I recommend for most people. It gives you the quality of a professional shoot with the convenience and speed of doing it yourself -- minus all the frustration.
| Feature | DIY Retouching | AI Headshot Generation (e.g., BetterPic) |
|---|---|---|
| Process | Manually adjust settings like brightness, contrast, and blemishes in an editing app. | Upload a few casual photos and let the AI create a portfolio of polished headshots. |
| Cost | Free to low-cost (using free apps like Snapseed or a one-time app purchase). | A one-time fee starting at $35. |
| Time Investment | Roughly 15–30 minutes per photo, depending on your skill level. | 2 hours at $35, 1.5 hours at $39, and 1 hour at $79. |
| Outcome | One enhanced version of your original photo. | 20 4K headshots at $35, up to 120 4K headshots at $79, with tier-specific styles. |
How Should You Adapt Your Headshot for Different Uses?
Social Media and LinkedIn
- Crop tight -- shoulders up -- since the display size is small
- Use a simple background so it reads well as a tiny thumbnail
- Your expression should be warm and approachable (you're networking, not interrogating)
- Make sure it looks like you right now, not you five years ago
- Here's how to nail your LinkedIn headshot specifically
Business Cards and Print
- Use a higher-resolution file (300 DPI minimum)
- Stick to more formal attire and a clean, simple background
- Keep the edit consistent with your other branding materials
Industry-Specific Adjustments
- Corporate / Finance / Law: Formal attire, neutral background, confident expression. See our lawyer headshots examples and executive headshot tips.
- Creative / Design / Marketing: More room for personality -- colorful backgrounds, casual attire, more expressive poses
- Tech / Startups: Clean and modern. Solid-colored shirt, simple background, friendly but competent vibe
- Healthcare / Education: Approachable and trustworthy. Softer lighting, warm smile, professional but not stiff
Understanding what a headshot is and why you need one can help you think about how yours fits into your overall professional presence.
Frequently Asked Questions
How do you take a professional headshot at home?
Find a clean wall for your background, set up near a large window for natural light, use a tripod and self-timer (or remote), and wear a solid-colored top. Shoot during the golden hour or on an overcast day for the most flattering light. Take at least 50-100 shots in different poses and expressions, then pick the best 2-3 to lightly edit. For an easier path, upload your casual photos to BetterPic and get studio-quality results as fast as about an hour.
What is the best camera for headshots?
A DSLR or mirrorless camera with a 50mm or 85mm portrait lens gives the best results. Great budget options include the Canon EOS Rebel series or Sony Alpha a6000. That said, a modern smartphone (iPhone 13 or later, Samsung Galaxy S21 or later) using Portrait Mode and the rear camera can produce surprisingly good headshots -- especially with proper lighting.
What should you wear for a professional headshot?
Stick to solid, muted colors like navy, charcoal, deep green, or white. Avoid busy patterns, logos, and neon colors. Wear something that fits well and matches the formality of your industry. Iron everything. Layers (a blazer, cardigan, or scarf) add visual interest without being distracting.
How much does a professional headshot cost?
A session with a professional photographer typically runs $150-500+, depending on your location and the photographer's experience. You usually get 2-5 retouched images. AI headshot services like BetterPic cost significantly less and deliver multiple polished options from your existing photos.
Can you take a professional headshot with a phone?
Yes, absolutely. Use the rear camera (not front-facing), turn on Portrait Mode, shoot in good natural light, and use a tripod. Clean the lens, shoot at the highest quality setting, and never use the flash. The biggest limitation with a phone is self-directing -- it's hard to pose yourself when you can't see the screen. That's where AI headshot tools have a real advantage.
How is an AI headshot different from a regular photo?
An AI headshot takes your casual, everyday photos and generates a studio-quality professional image with proper lighting, a clean background, and a polished look. The AI handles all the things that normally require a photographer and editing software -- lighting adjustments, background selection, retouching, and composition. With BetterPic, the output looks like you sat for a professional session, without actually needing to book one.
How do I make sure my team's DIY headshots look consistent?
Getting a whole team's headshots to look uniform is a classic DIY challenge, but it's manageable with a little planning. Draft a simple, one-page "Headshot Guide" and send it to the entire team.
Your guide should lock down a few key rules:
- Background: Everyone uses a solid, neutral wall (light gray or off-white is perfect).
- Lighting: Ask everyone to face a large window for soft, consistent natural light.
- Framing: Include a sample photo showing exactly how they should be framed—chest-up is standard.
- Dress Code: Be specific. "Solid-colored business casual tops" is much better than "dress professionally." For a subtle, cohesive look, have everyone wear colors that align with the company's brand palette rather than forcing a uniform.
Even with these rules, getting perfect consistency with different phones and home setups is tough. A hybrid approach often works best. Have everyone submit their best DIY shots, then use an AI headshot service to apply the same background, style, and professional edits to each photo. It’s an efficient way to get a polished, uniform set of images. You can check out AI headshot pricing and packages to see what might work for your team size and budget. This way, everyone looks their best while reinforcing a strong, cohesive brand identity.
Sources & References
- LinkedIn Profile Photo Tips — LinkedIn
- How Your Profile Photo Impacts Your LinkedIn Presence — LinkedIn Official Blog
- AI Image Generation Market Report — Grand View Research
- How AI Is Changing Photography — Forbes
- Professional Headshot Photography Pricing — Thumbtack

Written by
Apoorv SharmaHead of Performance
Apoorv leads performance and growth at BetterPic with 9+ years of experience across SEO, SEM, and growth marketing. He oversees content strategy, data-driven marketing, and hands-on testing of AI headshot platforms. Previously held senior performance marketing roles across the US, Belgium, and India.
- Google Analytics & Google Ads certified
- HubSpot Inbound & Content Marketing certified
- 9+ years in SaaS growth and performance marketing
Preferred source
Follow BetterPic on Google
Add BetterPic as a preferred source and our headshot guides are more likely to show up in your Top Stories, with a badge in AI Mode and AI Overviews.

Related professional headshots for individuals resources
Keep exploring this topic with focused resources from the B2C journey.
Primary destination:Professional headshots online
Frequently Asked Questions
What are some tips for taking a professional headshot with my phone?
- Using a smartphone can yield excellent headshots if done correctly. First, ensure good lighting by positioning the subject near a window or outdoors. Natural light enhances the appearance significantly. Next, hold the camera at eye level. This angle is most flattering and conveys confidence. Finally, use the highest resolution setting available for clear images.
What techniques should I use to capture a headshot for LinkedIn?
- When capturing a headshot for LinkedIn, focus on clarity and professionalism. Choose a neutral background that is not distracting. This helps keep the focus on the individual. Make sure the subject dresses appropriately for their industry. Attire should match the professionalism expected in the field. A clear smile can also engage viewers and create a welcoming impression.
Can you suggest ways to take high-quality headshots at home?
- To take high-quality headshots at home, select a clean, uncluttered background. A solid color wall often works best. Use a tripod or stable surface to avoid shaky images. If possible, use a remote shutter or a timer feature to take the photo without needing to press the button manually.
What poses are recommended for a professional-looking headshot?
- Posing is crucial for a professional-looking headshot. Subjects should stand or sit up straight to convey confidence. Angling the body slightly sideward can create a more dynamic look. Relax the arms and shoulders to avoid stiffness. A slight tilt of the head can also add interest and approachability to the image.
How should beginners approach taking their first professional headshot?
- Beginners should plan ahead before taking their first headshot. This includes choosing proper attire and finding a suitable location with good lighting. Practicing poses in the mirror can build confidence. Reviewing other headshots for inspiration can also help in determining what works visually.
What are the key elements that make a headshot look professional?
- Key elements of a professional headshot include clarity, appropriate lighting, and a clean background. The subject’s expression should be genuine, striking a balance between friendliness and professionalism. Additionally, attire should align with the industry’s expectations. Paying attention to hair and makeup can enhance the overall appearance and professionalism of the shot.
Related articles
View all articles
How much does a headshot cost in 2026?
What professional headshots actually cost, what drives the range, the charges that are not in the quoted price, and how to compare a session against an AI alternative.
Cheap AI Headshots: What $29 Actually Gets You vs. a $400 Photographer
A no-BS breakdown of cheap AI headshots in 2026: what they cost, how they compare to studio photography, and whether the results actually work for LinkedIn.
Professional Headshots: The Complete Guide to Getting Yours Right
Everything you need to know about professional headshots: how to get them (photographer, DIY, AI, corporate), what to wear, posing tips, lighting.
How to Get a Professional Headshot for Your Career
A complete guide to getting a professional headshot for your career—compare photographers, AI headshot generators, and DIY options by cost, quality, and speed.
8 Headshot Poses That Actually Work (And When to Use Each One)
The 8 headshot poses that actually work — with specific guidance on when to use each one, how to nail it in a studio or with AI, and which industries.
How to Prepare for Professional Headshots and Make a Great Impression
Learn how to prepare for professional headshots with practical tips on wardrobe, posing, grooming, and choosing the right photographer.
Save 87%on average on your professional photos.
Whenever, wherever you are.
Get studio-quality, 4K images in a variety of outfits & settings in less than an hour.
Get your headshots nowStart now