
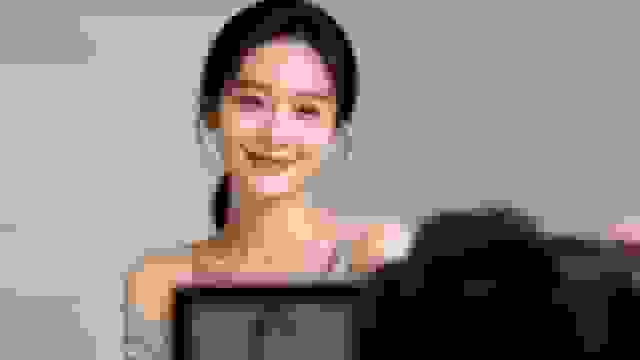
How to Get a Professional Headshot for Your Career

This article is part of our Professional Headshots collection.
Gone are the days when a professional headshot was a nice-to-have. Now, it’s an essential part of your career toolkit. You’ve got three main ways to get one: hire a photographer for the classic, expert-guided experience, use an AI generator for unbelievable speed and variety, or go the DIY route for total creative freedom without spending a dime. Each path offers a different mix of quality, cost, and time investment.
Why does a professional headshot matter for your career?
In a world where your LinkedIn profile often precedes a handshake, your headshot is your digital first impression. It’s the first thing recruiters, clients, and future colleagues see, and it speaks volumes before you ever say a word. A sharp, authentic photo telegraphs confidence and competence, helping you cut through the noise in a crowded digital space.
This isn't just about looking good. It's about getting seen. Data shows that LinkedIn profiles with a professional photo get up to 21 times more views. That single image can be the difference between getting noticed and getting scrolled past. If you want to dig deeper, you can explore more about the growing importance of professional images.
Understanding Your Headshot Options
So, how do you get a headshot that works for you? It starts with knowing what’s out there. The modern landscape gives you a few distinct choices, each built for different priorities, budgets, and deadlines.
- Hiring a Professional Photographer: This is the gold standard for a reason. You’re paying for expertise—a pro who knows how to light you perfectly, guide your posing, and capture your best, most authentic expression. The result is almost always a premium-quality image.
- DIY Photoshoot: The ultimate budget-friendly option. With a good smartphone camera and some natural light, you can absolutely capture a solid headshot. This path gives you complete control, but success really hinges on having a good eye for detail.
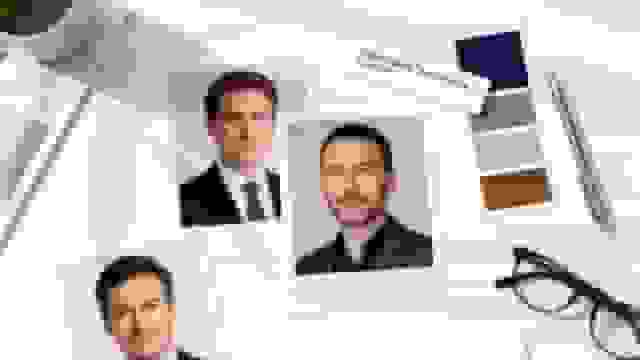
- AI Headshot Generators: The new kid on the block, and incredibly efficient. Upload a handful of selfies, and within minutes, you can have hundreds of studio-quality, photorealistic options. The sheer variety and speed are unmatched.
A great headshot does more than just show what you look like. It communicates your professionalism, confidence, and personal brand. Think of it as a strategic tool for your career.
To help you figure out the best move, I've broken down the key differences between these methods.
Headshot Options At a Glance
The table below gives you a quick snapshot of what to expect in terms of cost, time, and the main benefit of each approach.
| Method | Average Cost | Time Commitment | Key Benefit |
|---|---|---|---|
| Professional Photographer | $250 – $1,500+ | 4-8 hours (incl. session & travel) | Unmatched quality and expert guidance. |
| DIY Headshot | $0 | 1-2 hours | Complete creative control and no cost. |
| AI Headshot Generator | $29 – $99 | Less than 1 hour | Speed, variety, and cost-effectiveness. |
Looking at the options side-by-side makes it clear: if you need the absolute best quality and have the budget, a photographer is a solid investment. If you're on a tight budget and have a decent eye, DIY is feasible. But for most professionals who need a great-looking headshot quickly and affordably, AI generators offer a compelling middle ground.
How do you define what you want before taking the shot?
A great headshot doesn't just happen with a camera flash; it starts with a clear plan. Before you even think about lighting or angles, you need to ask a fundamental question: what story do you want this image to tell? Think of your professional headshot as a strategic asset, a piece of communication that’s working for you 24/7.
The very first step is to nail down your core message. What adjectives do you want people to associate with you after seeing your photo? Getting this right will shape every single decision that follows, from your expression to the background.
Pinpoint Your Target Vibe
Your industry and role are the biggest clues here. A corporate lawyer’s headshot needs to telegraph authority and trust, while a graphic designer’s can lean into creativity and innovation. The goal is simple: align your visual identity with what your audience expects to see.
Are you aiming for any of these vibes?
- Authoritative and Polished: This is the classic look for professionals in finance, law, or executive leadership. It signals seriousness, experience, and complete reliability.
- Warm and Approachable: Perfect for consultants, therapists, real estate agents, or anyone whose job is built on connection. This style builds an immediate rapport.
- Creative and Modern: Ideal for artists, tech innovators, and marketing pros. It communicates a forward-thinking and dynamic personality.
Once you’ve picked a lane, you can start building the visual elements around it. This clarity ensures your final photo isn't just a picture, but a purposeful piece of your personal brand.
Choose a Background That Reinforces Your Message
The background is more than just a backdrop; it’s a supporting character in your story. A poorly chosen one can distract from you or, worse, send the wrong message entirely. The key is to pick a setting that complements your professional identity without overpowering it.
A finance professional, for instance, might opt for a classic solid gray or a subtle, out-of-focus office environment. This choice reinforces a sense of stability and corporate structure. On the other hand, a wellness coach might choose a natural, outdoor setting with soft light to evoke feelings of calm and authenticity.
Here are a few common options to consider:
- Studio Seamless: A solid color paper or canvas (gray, white, or blue) gives you a clean, distraction-free look. It's the most traditional and versatile option out there.
- Environmental/In-Office: Shooting in your actual workspace can add context and authenticity, showing you in your element.
- Outdoor/Natural: This can soften the overall feel, making you appear more relaxed and approachable. It works especially well for less formal industries.
Your background should support your professional narrative, not compete with it. A simple, clean setting almost always wins because it keeps the focus exactly where it should be—on you.
Create a Simple Creative Brief
Whether you're hiring a pro, using an AI tool, or directing the shoot yourself, a simple creative brief is your best friend. This document is your North Star, making sure the final output lines up perfectly with your goals. It doesn’t need to be some formal, complicated report—just a one-page summary of your vision.
A good brief should include:
- Core Message: A few bullet points defining the vibe (e.g., "Confident, expert, approachable").
- Visual Inspiration: Pull together 3-5 headshots you admire from platforms like LinkedIn or Pinterest. Make notes on what you like—is it the lighting, the pose, the expression?
- Expression Notes: How do you want to come across? A closed-mouth smile can look confident and serious, while an open-mouth smile feels warmer and more engaging.
- Wardrobe & Background Ideas: Briefly describe your planned outfit and preferred background style.
This little bit of prep work transforms a potentially stressful process into a focused, goal-oriented project. It’s the best way to guarantee that the professional headshot you get is the one you actually need.
You’ve nailed down the "why" behind your headshot, so now it's time to bring that vision to life. How you show up on camera—from your clothes to your posture—is what separates an authentic, professional photo from a stiff, awkward one. This is where your plan meets reality.
The camera sees things a little differently than we do in the mirror. An outfit that looks fantastic in person can sometimes be a major distraction in a photo. The trick is to make deliberate choices that keep the focus exactly where it belongs: on your face and your expression.
Dress for Success on Camera
Your wardrobe is one of the easiest ways to reinforce your professional brand. You're aiming for clothing that flatters you without stealing the spotlight. Think classic, simple, and in line with what your industry expects.
Solid colors are almost always your best bet. They create a clean, uncluttered canvas that lets your face be the main event. Jewel tones like emerald, sapphire, and deep reds are famously flattering on almost every skin tone.
To really get your wardrobe right, keep these tips in mind:
- Avoid Busy Patterns: Loud stripes, intricate florals, or wild geometric designs are the enemy of a good headshot. They pull the viewer's eye away from your face and can even create a weird shimmering effect (called moiré) in digital pictures.
- Focus on the Neckline: Since a headshot is all about the head and shoulders, your neckline is a big deal. V-necks, crew necks, and classic collared shirts are timeless choices that frame the face beautifully.
- Prioritize a Perfect Fit: Wear something that fits you perfectly. Clothing that’s too tight can create awkward lines, while anything too baggy will just make you look shapeless. Your clothes should feel comfortable enough to move in easily.
Here's a simple rule of thumb: pick an outfit you'd wear to a big client meeting. It should feel like you and project the confidence and competence you want to be known for.
Polished and Prepared Grooming
Grooming for a photoshoot isn't about a total transformation. It’s about looking like the best, most put-together version of yourself. Under professional lights, the little details really pop.
The prep starts a day or two before the shoot. Make sure you’re well-rested and hydrated—it makes a surprising difference in how your skin looks on camera. Even simple skin prep, like using a good moisturizer, creates a smooth canvas and prevents any dryness from showing up.
Here's a quick grooming checklist:
- Hair: Go for a clean, professional hairstyle that you won’t have to fuss with. Now is not the time to try a dramatic new haircut. Stick with a style you know works for you.
- Makeup: If you wear makeup, the goal is a natural, polished look. A light foundation can even out your skin tone, but steer clear of heavy contouring or trendy styles that will make your photo look dated in a year.
- Facial Hair: For anyone with a beard or mustache, make sure it’s neatly trimmed and shaped. A clean shave or a well-kept beard both send a strong, professional message.
This kind of prep ensures you look and feel great, which lets your natural confidence shine right through.
Posing for Confidence and Authenticity
"Posing" sounds way more intimidating than it is. It’s really just about making tiny adjustments to your posture to look confident and approachable. The goal isn't some dramatic, high-fashion pose, but a natural stance that looks and feels relaxed.
One of the most effective tricks in the book is the "lean-in." Just by leaning your upper body slightly toward the camera, you create an instant sense of engagement. It’s a tiny shift that makes a photo feel much more dynamic and connected.
Posture is also key. Sit or stand up straight, roll your shoulders back and down, and then gently push your chin forward and down. Photographers sometimes call this "turtling," and it works wonders for defining your jawline and getting rid of any hint of a double chin. It’s a universally flattering move. Remember, there are many different types of headshots, and your pose should fit the style you’re going for—from a traditional corporate look to something more creative.
And finally, your expression is everything. A genuine smile always reaches the eyes. Just before the shutter clicks, think of something or someone that makes you genuinely happy. This little mental trick can turn a forced, cheesy grin into a warm, authentic expression that truly connects with people.
Should you hire a photographer, go DIY, or use AI?
You've got a clear vision for your professional image. Great. Now it's time to decide how you'll actually get the shot. This is a critical fork in the road, and you’ve got three very different routes to choose from. Each comes with its own trade-offs in terms of cost, time, and the final result. Your best bet depends entirely on what you value most: expert guidance, creative control on a budget, or pure, unadulterated efficiency.
The Traditional Route: Hiring a Professional Photographer
Going with an experienced headshot photographer is the classic, premium choice for a reason. You're not just paying for a picture; you're investing in a professional's expertise. They understand light, angles, and how to pull a genuine expression out of someone who feels awkward in front of a camera. A great photographer is part artist, part director, guiding you through the whole process to make sure the final shot nails the brief you worked so hard on.
This is the path to unparalleled quality, but it requires the biggest investment of time and money. Be prepared to spend anywhere from $250 to over $1,500. You'll also need to block out several hours for the consultation, travel, and the shoot itself.
The Scrappy Solution: The DIY Headshot
If you're on a tight budget or just love having total creative control, the do-it-yourself approach is a perfectly viable option. Armed with a modern smartphone and some good natural light (a big window is your best friend), you can capture a pretty respectable headshot. This route puts you in the driver's seat for everything—framing, lighting, and directing your own poses.
The biggest perk? It’s free. The catch is that the quality of the final image rests entirely on your shoulders. You’ll need a good eye, a lot of patience, and a willingness to experiment to avoid the classic pitfalls of amateur photos, like harsh shadows and unflattering angles.
Whether you hire a pro or go it alone, this flowchart breaks down the prep work that's essential for a great outcome.
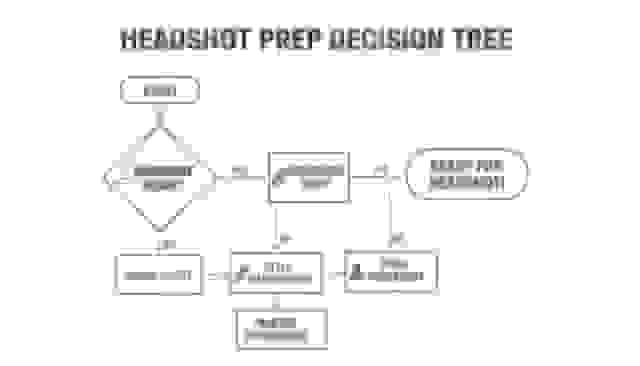
As you can see, nailing your wardrobe, grooming, and posing is foundational. Get these right, and you're halfway to a professional look, no matter which path you take.
The Modern Alternative: AI Headshot Generation
The newest player in the game is the AI headshot generator, and it's seriously impressive. This technology hits a sweet spot, blending affordability with high-quality, studio-level results. It’s perfect for busy professionals and teams who need consistency and variety without the logistical nightmare of a traditional photoshoot.
Platforms like BetterPic take a handful of your casual selfies and spin them into hundreds of unique, photorealistic headshots. You can get different styles, outfits, and backgrounds in a snap. The whole process is incredibly fast—often less than an hour from upload to delivery—and gives you a level of variety that’s physically impossible to replicate in a single photo session.
AI headshots solve the age-old problem of agonizing over which one or two photos to pick from a shoot. You get an entire portfolio of options to use across different platforms and for different professional needs.
It's no surprise that the professional headshot photography market is exploding. It's projected to hit USD 2,514.75 million by 2035, a trend directly tied to our increasingly digital work lives. With 58% of U.S. workers now hybrid or remote, a strong online presence is essential, making efficient headshot solutions more critical than ever.
Comparing Your Options: Cost, Speed, and Variety
To make the right call, you need a side-by-side look at what each path really offers. Let's break it down by the three factors that matter most.
1. The Cost Breakdown
- Photographer: The priciest option by far. You’re paying for skill, equipment, and studio time.
- DIY: Essentially free, assuming you own a smartphone.
- AI Generator: The most cost-effective way to get professional-grade results, usually for under $100.
2. The Time Commitment
- Photographer: This is a process. It involves scheduling, travel, the shoot itself, and then waiting for edits. You could easily sink 4-8 hours into it.
- DIY: Can be knocked out in 1-2 hours, including setup and some basic editing.
- AI Generator: By far the fastest. The entire journey from uploading selfies to downloading your new headshots takes less than an hour.
3. The Variety and Customization
- Photographer: You'll walk away with 2-5 perfectly retouched images from a session, likely in one or two outfits.
- DIY: You can take a million photos if you want, but they'll all be in the same setting and the same outfit.
- AI Generator: This is where AI really shines. You get hundreds of options with different backgrounds, clothing, and expressions, creating a whole library of images. You can check out the huge range of AI headshots to see what's possible.
For most professionals and enterprise teams today, the combination of speed, affordability, and sheer choice makes AI the most practical and powerful solution for getting a top-tier headshot.
How do you use your new headshot for maximum career impact?
Getting the perfect shot is a huge milestone, but your work isn’t quite done. The final steps—post-production and actually using the photo—are what turn a great image into a powerful career tool. This is where you polish the final product and roll it out across your entire digital footprint.
The first part of this process is professional retouching. This isn't about making you look like a different person; it's about subtle enhancements that create a polished, professional final image. Think of it as quality control for your personal brand.
The Role of Professional Retouching
Good retouching is an art form. The goal is to remove temporary distractions so the focus stays entirely on you and your authentic expression. A skilled editor makes tiny adjustments that you might not even consciously notice, but they all work together to improve the final result.
Some common, and totally normal, enhancements include:
- Color Correction: Making sure your skin tones look natural and the colors in the photo are balanced and true to life.
- Blemish Removal: Taking care of temporary imperfections, like a stray pimple or a piece of lint on your jacket that you missed.
- Exposure Adjustments: Slightly brightening the image or tweaking the contrast to make your features pop.
- Stray Hair Removal: Taming any flyaways that might distract from an otherwise clean, sharp look.
A good rule of thumb for retouching is that you should still look exactly like yourself on your best day. The final image should feel authentic and true, just without any minor, temporary distractions.
Understanding File Formats and Resolution
Once your headshot is retouched, you’ll get the final files. It’s critical to understand that not all image files are created equal. You’ll need different versions of your headshot for different places, and the main difference is resolution.
A high-resolution file is absolutely essential for anything that will be printed. This version is packed with data, which ensures the image looks crisp and clear on a conference brochure, a business card, or in a magazine. If you use a low-res image for print, it will come out looking like a blurry, pixelated mess. Trust me.
On the flip side, a low-resolution file is optimized for the web. These files are much smaller, so they load quickly on websites and social media profiles. Using a massive, high-res image online can seriously slow down page load times, which is a bad experience for anyone visiting your profile. For a deep dive on this, check out our tips for creating the perfect LinkedIn headshot.
File Types You'll Encounter
| File Type | Best For | Why It's Used |
|---|---|---|
| JPEG (.jpg) | Web Use (LinkedIn, websites, email) | Small file size, universal compatibility. Ideal for fast loading. |
| TIFF (.tif) | High-Quality Printing | A "lossless" format that retains all image data for maximum print quality. |
| PNG (.png) | Web Use with Transparency | Great for websites if you need a transparent background behind your headshot. |
Your Headshot Deployment Checklist
With your polished, correctly-formatted files in hand, it’s time to update your professional presence everywhere. Consistency is the name of the game here. Using the same high-quality headshot across all platforms builds a recognizable and cohesive personal brand.
Here’s an actionable checklist to get you started:
- Social Media Profiles: Start with the platforms that matter most in your industry. For most people, that’s LinkedIn, maybe X (formerly Twitter), and any professional association profiles.
- Company Website: Get your new photo up on the "About Us" or "Team" page.
- Email Signature: Adding your headshot to your email signature is a small touch that makes every message feel more personal and professional.
- Online Portfolios & Personal Website: If you have a portfolio site like Behance, Dribbble, or your own personal domain, make sure it features your new image prominently.
- Guest Posts & Speaker Bios: Have the file ready to go for any upcoming speaking gigs, podcast appearances, or articles you’re writing.
One last thing: if you worked with a photographer, make sure you're clear on your usage rights. You need to know that you have permission to use the photo across all these platforms without any restrictions. Getting this sorted out upfront ensures your new headshot can serve your career for years to come.
What Our Data Shows About Getting the Best Results
After processing 32 million+ headshots, we have identified the factors that most influence final quality:
- Upload quantity matters: 10-12 photos is the sweet spot. Users who upload 10-12 source photos report the highest satisfaction rates. Below 8, the AI lacks enough reference data. Above 15, additional photos show diminishing returns.
- Natural lighting in source photos produces the best AI output. Headshots generated from well-lit indoor or outdoor selfies score 28% higher on our quality evaluation system than those from dim or artificially lit sources.
- Variety of angles is the single biggest quality predictor. Users who include front-facing, slight left, and slight right angles produce results that are rated as more natural and lifelike than single-angle uploads.
- First-time users underestimate the importance of a neutral expression in source photos. Exaggerated smiles or serious faces in uploads lead to less natural AI output. Our AI feedback system now flags this during the upload step.
- Morning uploads correlate with higher satisfaction. Users who upload between 8-11 AM report 12% higher satisfaction, likely because lighting conditions are better for selfies during morning hours.
Common questions about getting a professional headshot
Even with the best game plan, a few questions always come up when you’re sorting out a new professional headshot. Let's tackle the most common ones with some straight-up, practical advice so you can move forward without any second-guessing. We'll cover everything from how often you need a refresh to what really separates a great shot from an amateur one.
I’ll also get into whether the new wave of AI tools can actually deliver the goods when it comes to studio-quality results.
How Often Should I Update My Professional Headshot?
The general rule of thumb is to update your headshot every two to three years. This keeps your professional image current and ensures it actually looks like you. But this isn't set in stone—certain career or life events should definitely trigger an earlier update.
You’ll want a new headshot right away if your appearance changes in any significant way. Think a new hairstyle or color, growing or shaving a beard, or getting glasses you wear all the time. The goal is simple: your photo should look like you on a good day, not you from five years ago.
If someone meets you in person after seeing your LinkedIn profile and does a double-take, it’s a massive red flag. An outdated photo can create a weird sense of distrust before you even say hello.
For anyone in a fast-moving field or actively building a personal brand, an annual refresh is a smart move. It shows you’re on top of your game and engaged with where your industry is headed. A new photo is also a great way to mark a big career milestone, like a promotion or launching a new company.
What Makes a Headshot Look Unprofessional?
There are a handful of dead giveaways that can make a headshot look amateur, instantly hurting the professional image you’re trying to build. Knowing what these are is the first step to making sure you avoid them, whether you’re taking the photo yourself or vetting a photographer.
The biggest culprits are usually technical screw-ups. These include:
- Bad Lighting: Harsh, direct light creates ugly shadows, while a photo that's too dark just looks sloppy and unprofessional.
- Low Resolution: A blurry or pixelated image screams a lack of attention to detail. Your photo needs to be crisp and sharp, no excuses.
- Distracting Backgrounds: A cluttered office, your messy living room, or some chaotic outdoor scene pulls all the focus away from you, the subject.
Beyond the technical stuff, the photo's context is huge. A selfie, especially one from a high angle with your arm in the shot, just reads as casual and is completely out of place for professional use. Wearing super trendy or sloppy clothes that don't fit your industry can send the wrong message, too. And of course, a forced, awkward smile or heavy-handed editing with cheesy filters are clear signs of an amateur job.
Can I Really Get a Studio-Quality Headshot with AI?
Yes, absolutely. Modern AI technology has come a long way, and it’s now a genuinely reliable and high-quality option for getting professional headshots. This isn't some far-off concept anymore; it's a practical tool that thousands of professionals are using to get amazing results quickly and without breaking the bank.
Today's AI headshot generators, like BetterPic, work by analyzing a small batch of your casual selfies. The software learns your unique facial structure, skin tone, and features from different angles. Using that data, the AI can then generate hundreds of totally unique, photorealistic images of you.
The real game-changer here is the variety. The AI can place you in different professional settings, try out various outfits, and generate shots with different lighting and expressions. The final images are often so good they’re indistinguishable from a traditional photoshoot, giving you a ton of options that would be impossible to get in a single studio session. It's an incredibly efficient and affordable way to build a whole portfolio of professional, studio-quality options in less than an hour.
Ready to create a headshot that opens doors? At BetterPic, we use advanced AI to generate hundreds of studio-quality, photorealistic headshots in minutes. Skip the hassle of a traditional photoshoot and get a library of professional images tailored to your brand. Create Your Perfect Headshot Today
Sources & References
- LinkedIn Profile Photo Tips — LinkedIn
- How Your Profile Photo Impacts Your LinkedIn Presence — LinkedIn Official Blog
- AI Image Generation Market Report — Grand View Research
- How AI Is Changing Photography — Forbes
- Professional Headshot Photography Pricing — Thumbtack

Written by
Apoorv SharmaHead of Performance
Apoorv leads performance and growth at BetterPic with 9+ years of experience across SEO, SEM, and growth marketing. He oversees content strategy, data-driven marketing, and hands-on testing of AI headshot platforms. Previously held senior performance marketing roles across the US, Belgium, and India.
- Google Analytics & Google Ads certified
- HubSpot Inbound & Content Marketing certified
- 9+ years in SaaS growth and performance marketing
Related professional headshots for individuals resources
Keep exploring this topic with focused resources from the B2C journey.
Primary destination:BetterPic homepage
Frequently Asked Questions
How much does a professional headshot cost?
- A professional photographer charges $250-1,500+ and requires 4-8 hours including travel and session time. DIY costs nothing but takes 1-2 hours. AI headshot generators cost $29-99 and deliver results in under an hour with hundreds of options.
Can you get a studio-quality headshot with AI?
- Yes. Modern AI headshot generators like BetterPic analyze your selfies to learn your facial features, then generate hundreds of photorealistic headshots with different backgrounds, outfits, and lighting. The results are often indistinguishable from traditional studio photography.
How often should you update your professional headshot?
- Update every 2-3 years, or sooner after any significant appearance change like a new hairstyle, growing a beard, or getting glasses. If someone meeting you in person does a double-take compared to your photo, it is time for an update.
What should you wear for a professional headshot?
- Wear solid colors in jewel tones like emerald, sapphire, or deep red. Avoid busy patterns, large logos, and extreme necklines. Choose clothing appropriate for your industry and ensure a perfect fit. Your outfit should match what you would wear to an important client meeting.
What makes a headshot look unprofessional?
- Common problems include bad lighting with harsh shadows, low resolution or pixelated images, distracting cluttered backgrounds, selfie angles with arms visible, overly trendy or casual clothing, and forced awkward smiles. Technical quality and natural expression are essential.
Save 87%on average on your professional photos.
Whenever, wherever you are.
Get studio-quality, 4K images in a variety of outfits & settings in less than an hour.
Get your headshots nowStart now