
How to Pose for Pictures Standing: Master Confident, Natural Poses

Knowing how to pose for pictures while standing is all about creating subtle angles and shifting your weight to look natural and confident. It’s not about striking a rigid, frozen position. Instead, you want to move your body in small ways to create dynamic, flattering lines.
The secret is mastering just a few foundational elements. Get these right, and stiffness instantly disappears.
Building a Foundation for Confident Poses
We've all been there. That awkward feeling of just "standing there" for a photo is universal. You plant your feet, your arms hang at your sides, and you end up looking like a cardboard cutout.
The good news? Moving past this is way simpler than you think. You don't need to memorize a hundred different poses. You just need to understand the core principles that make any standing pose look good.
Our goal is to build a solid foundation so every other tip feels intuitive. We'll start with the three pillars of a great standing shot: your posture, how you distribute your weight, and the angles you create. Tiny tweaks in these areas can completely transform your presence on camera.
The Power of Posture
Everything starts here. Good posture is the single fastest way to look more confident and put-together in a picture. Slouching makes you look shorter and less engaged, but standing tall elongates your frame and screams self-assurance.
Before the camera even clicks, take a second to reset. Imagine a string gently pulling you up from the crown of your head. It’s a simple trick that helps straighten your spine without feeling forced.
- Roll Your Shoulders Back and Down: This is a classic for a reason. It opens up your chest, prevents hunching, and makes your neck look longer.
- Engage Your Core: Just lightly tightening your abs gives you stability and improves your overall alignment.
- Tuck Your Chin Slightly: This little move helps define your jawline and avoids the dreaded "double chin" effect.
A strong posture is your starting point for any successful pose. It communicates confidence before you even think about where to put your hands or how to angle your body.
Mastering Weight Distribution
How you shift your weight is the secret to avoiding that static, blocky look. Standing with your weight evenly on both feet often comes across as rigid, even a bit confrontational. The key is to create a little asymmetry, which is far more visually appealing and looks infinitely more relaxed.
To really nail this, a quick look back at art history is surprisingly helpful. Let's take a look at the three foundational principles that can instantly make your standing poses look more natural.
Three Keys to a Natural Standing Pose
| Principle | What to Do | Why It Works |
|---|---|---|
| The "S" Curve | Shift 70-80% of your weight onto one leg (usually your back leg). | Creates a natural, relaxed curve in your body, breaking up stiff, straight lines. This is based on the classic contrapposto stance from art. |
| Pop a Hip | Let the hip on your "resting" leg pop out slightly. | This simple action introduces angles and dimension, making you look more dynamic and less two-dimensional. |
| Bend a Knee | Slightly bend the knee of your front leg. | It adds to the relaxed look and prevents your legs from appearing stiff or locked, which can look awkward on camera. |
By combining these three small adjustments, you create a pose that feels—and looks—effortlessly confident.
This concept isn't new. It’s rooted in the contrapposto stance, a technique from ancient sculpture that was revived during the Renaissance. It's all about shifting most of your weight onto one leg, which causes your hips and shoulders to tilt in opposite directions and creates that natural S-curve. Photographers adopted this in the late 19th century to get away from stuffy portraits, and it’s still a go-to trick today.
A simple weight shift instantly adds curves and makes the pose more interesting. Try putting about 70-80% of your weight on your back leg and slightly bending the knee of the front one. This subtle adjustment is a game-changer for professional photos. For more tips on getting that polished look, check out our guide on how to get perfect LinkedIn headshots. This one change alone can make you look dramatically more comfortable and photogenic.
Mastering Your Posture and Body Angles
Alright, you've nailed your posture and got a feel for shifting your weight. Now for the fun part: angling your body. This is where you go from just standing there to actually posing. It's all about creating interesting lines that give your photo depth and make you look both confident and completely natural.
Here’s one of the oldest tricks in the book: never face the camera straight-on. It’s not your friend. A head-on stance tends to look wider and can even feel a bit confrontational or stiff. The simple act of turning your body just a little bit makes a world of difference, instantly creating a more dynamic shape.
The 45-degree angle is the gold standard for a reason. Turn your feet and hips about 45 degrees away from the camera, then twist your torso back toward the lens. This little move slims your profile and carves out a much more engaging silhouette. It's a foundational technique for anyone learning how to pose for pictures standing.
Creating the Classic S-Curve
The 'S-curve' is a timeless pose that looks incredible on everyone, and it's way easier to create than you might think. It all comes back to that weight shift we talked about. By putting most of your weight on one leg, your opposite hip naturally pops out, creating a soft 'S' shape all the way down your body.
And this isn't just some old modeling secret; the data backs it up. An analysis of popular social media photos revealed a massive preference for poses that elongate the body. One study found the S-curve, with its signature hip pop, showed up in roughly 45% of professional modeling shots and over 35% of top influencer posts. You can see these trends for yourself by browsing through platforms like Getty Images.
Ready to try it?
- Start with your feet slightly apart.
- Shift about 80% of your weight to your back leg.
- Let the hip on your unweighted side push out naturally.
- Soften the knee of your front leg—give it a gentle bend.
This simple sequence creates a pose that feels relaxed but looks incredibly intentional and polished.
This handy visual breaks down how each small adjustment builds on the last, taking you from a basic stance to a dynamic body angle.
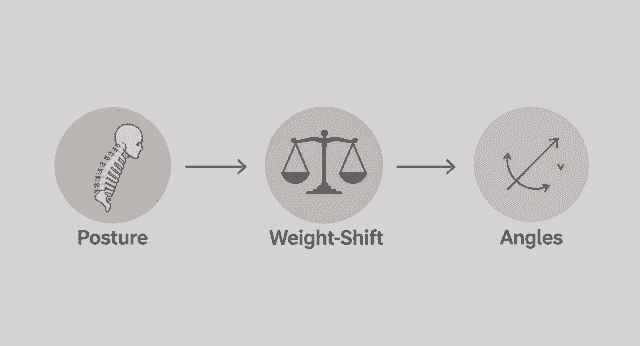
As the chart shows, a great pose isn't just one thing—it's a series of small, connected movements working together.
The Crucial Role of Your Shoulders
Your shoulders do a lot more than you realize. They're a dead giveaway for your mood and confidence level. Slump them forward, and you look timid. Push them too far back, and you look stiff and unnatural.
The sweet spot is a relaxed, confident middle ground. A fantastic little trick is to roll your shoulders up toward your ears, pull them back, and then just let them drop into place.
So many people tense up their shoulders without realizing it. Right before the camera clicks, take a deep breath in and consciously drop your shoulders as you exhale. It's a tiny move that makes you look instantly more comfortable and open.
This shoulder roll accomplishes a few key things:
- It makes your neck look longer, which is always a plus.
- It opens up your chest, which projects confidence.
- It locks in your good posture, reinforcing that strong foundation.
Think about it: how do you stand when you feel stressed versus when you feel proud? Your shoulders tell the story. By setting them in a confident position on purpose, you can actually trick yourself into feeling more confident during the shoot.
Get in front of a mirror and play around with these angles. See how a slight turn, a hip pop, or a shoulder adjustment completely changes your look. The more you practice, the more these movements will become second nature, helping you create amazing standing poses every single time.
Solving What to Do With Your Hands
It's the classic, age-old question of posing: "What do I do with my hands?" Just letting them hang by your sides is a surefire way to look stiff and awkward in a photo. But here's the good news: your hands are one of your most powerful posing tools, capable of adding genuine personality and shape to your images.
Instead of seeing them as a problem to be solved, think of them as an asset. The trick is to give them a purpose—a reason for being where they are. That one shift in mindset immediately makes any pose look more natural and intentional.

Casual and Relaxed Hand Placements
If you're aiming for a laid-back, approachable vibe, your hand placement needs to look effortless. Pockets are your absolute best friend here. They're a natural resting spot and solve the "what to do" problem in an instant.
Just don't shove your whole hand deep into your pocket—that can look clumsy. Instead, try one of these more subtle variations:
- The Thumb Hook: Just hook your thumb into a front or back pocket, letting your other fingers relax on the outside. It's a classic, confident look that never fails.
- The Partial Tuck: Slide four fingers into your front pocket but leave the thumb out. This works great for everyone and gives off a casual-cool attitude.
- The Back Pocket Rest: Lightly place one hand on top of your back pocket. This is especially effective when you're angled away from the camera because it helps define your waistline.
Poses for a Confident and Powerful Look
When you want to project confidence, use your hands to create strong, defined shapes. Placing a hand on your hip is a go-to power pose for a reason—it just works.
It instantly carves out your waist and creates a flattering silhouette. But how you do it is what counts. Don't just jam your hand on your side, which can look forced. Instead, let it rest lightly on your hip with a slight bend in your elbow.
A critical part of posing is creating "negative space." This simply means leaving a visible gap between your arms and your torso. Placing a hand on your hip naturally does this, preventing your arms from being pressed against your body and making your waist appear slimmer.
Crossing your arms is another powerful option. While it can sometimes be read as defensive, a relaxed arm cross conveys authority and self-assurance, especially in professional headshots. The key is to keep your shoulders down and relaxed, not tensed up, and avoid clenching your fists.
Adding Softness and Connection
Your hands can also bring a sense of softness to a photo or draw attention directly to your face. This is a perfect technique for more thoughtful, personable portraits.
Try lightly touching your face or hair. A gentle touch to the jawline, temple, or even just brushing a piece of hair back can add a really engaging, delicate element to your pose. The keyword here is "lightly." Don't press into your skin; just let your fingers graze the surface.
You can also have your hands interact with your clothing or an accessory, which always looks natural:
- Adjusting a Cufflink or Watch: This gives your hands a clear purpose and looks incredibly candid.
- Holding the Lapel of a Jacket: A classic move that communicates sophistication and control.
- Playing with a Necklace or Scarf: A subtle interaction like this can add a nice touch of personality and movement.
These small, purposeful actions turn your hands from awkward appendages into a core part of your pose. They help tell a story and add a layer of authenticity, making you look comfortable and completely in control.
Bringing Your Pose to Life with Your Expression
A technically perfect body pose can feel completely flat without the right facial expression. This is the final, crucial layer where you actually connect with the camera and let your personality shine through. It’s the difference between a picture of a person and a portrait of you.
All the work you've put into your posture and body angles just sets the stage; your face is what tells the story. Learning to control your expression, from your eyes to your smile, is a game-changing skill for anyone wondering how to pose for pictures standing up. It’s all about creating a look that feels authentic and engaging.
Finding Your Angles and Directing Your Gaze
Let’s be honest, most of us have a side of our face we prefer in photos. If you don't know yours yet, just take a few selfies from different angles and see what feels most natural. Often, simply having your "good side" slightly closer to the camera gives you an instant confidence boost.
From there, a simple chin tilt can dramatically shift the mood. Tucking your chin down slightly often defines the jawline and can come across as more assertive or intimate. Lifting it just a bit can project a feeling of openness and confidence.
Where you look is just as critical. Your gaze directs the viewer's attention and sets the entire emotional tone of the photograph.
- Looking Directly at the Lens: This creates a powerful, direct connection with the viewer. It's perfect for professional headshots or any photo where you want to appear engaging and confident.
- Gazing Just Off-Camera: This is a great technique for a more candid, thoughtful look. It feels less posed, almost as if the photographer captured you in a natural moment of reflection.
- Looking Over Your Shoulder: When you combine this with a 45-degree body turn, you add a touch of drama and intrigue. It’s a dynamic pose that creates beautiful lines along the neck and shoulder.
Crafting a Genuine Expression
The most common struggle I see is the smile. A forced, tight-lipped grin can make even the best pose look awkward. The secret to a genuine smile is to think of something that actually makes you happy.
Seriously, think about a funny memory, a person you love, or an exciting trip you have planned. Let that genuine feeling reach your eyes—this is what photographers call a "Duchenne smile," and it's what separates a real smile from a fake one. A true smile involves the muscles around your eyes, not just your mouth.
Your expression is the final piece of the posing puzzle. It’s not just about smiling; it's about conveying an emotion. Whether you want to look confident, warm, or thoughtful, it all starts with your eyes and your internal focus.
But you don't always have to smile. A relaxed, neutral expression can be just as powerful, conveying a quiet confidence and serenity. The key is to avoid looking blank—engage your eyes by thinking a specific thought, which will add depth to your gaze. Softly parting your lips can also help your mouth look less tense.
Mastering your expression ties everything together. It ensures that when you stand for a photo, you're not just presenting a well-angled body; you're presenting your authentic self. That connection is what turns a good photo into a great one.
Using Your Environment to Enhance Your Pose
A powerful photograph is rarely just about you. It's about how you fit into, and interact with, the world around you. Learning how to pose for pictures standing isn’t complete until you start seeing your environment not as a background, but as an active partner in your photo.
This simple shift in perspective is a game-changer. Instead of just standing awkwardly in an open space, look for ways to connect with what’s around you. Architectural elements, natural landscapes, and even your own clothing can add context, depth, and a sense of ease to your final shot. This is how you move from simply standing in a location to truly inhabiting it.

Lean Into Your Surroundings
One of the fastest ways to look more relaxed and natural is to give your body some support. Try leaning against a wall, a railing, a doorway, or even a piece of furniture. It instantly breaks up the stiffness of a straight-on pose.
This simple act communicates a casual confidence. It gives your body a natural reason to be angled, making poses like the S-curve feel even more effortless.
- The Wall Lean: Stand with your side to a wall and lean your shoulder and hip against it. You can cross one leg over the other for a classic, cool look.
- The Railing Rest: Facing a railing, you can lean forward slightly, resting your forearms on it. This is great for scenic shots as it naturally directs your gaze outward.
- The Doorway Frame: Use a doorway to frame your body. Leaning one shoulder against the frame creates compelling lines and adds architectural interest.
Using your environment isn’t just for casual photos. A recent industry report found that standing poses that utilized props like walls or chairs increased a photo's appeal score by 30-50% based on client feedback and online engagement.
These interactions make the pose look less staged and more like a captured moment in time.
Treat Your Wardrobe as a Prop
Your clothing is more than just an outfit—it's a dynamic tool you can use to enhance your pose. The fabric, cut, and even pockets of your clothes can solve common posing dilemmas and add a layer of personality. This is especially true when creating consistent and professional looks for your whole team. If your company is looking to create a unified image, understanding how outfits work in photos is a huge asset. For more ideas on this, check out our guide to creating cohesive headshots for teams.
Pockets, for instance, are the perfect solution for awkward hand placement. Hooking a thumb or sliding a few fingers into a pocket provides a natural resting place and projects a relaxed vibe.
Beyond pockets, think about how your clothing moves and feels. A structured blazer can instantly improve your posture by defining your shoulders. A flowing skirt or dress? Use it to create a beautiful sense of movement. Simply holding the fabric and letting it catch a breeze can turn a static photo into something truly dynamic.
Using Lines and Frames
Train your eye to see the lines and natural frames in your environment. These elements are compositional gold—they guide the viewer’s eye directly to you and add a sophisticated layer to your photograph.
Look for leading lines—things like pathways, fences, or the edge of a building—that create a visual path toward you. Posing along these lines makes for a much more compelling image than just standing in the middle of nowhere.
Natural frames also add incredible depth and focus.
- Architectural Frames: Doorways, archways, and windows are perfect for this.
- Natural Frames: Stand between two trees or use overhanging branches to frame the top of your shot.
By placing yourself within these elements, you become the clear focal point. You're no longer just a person in a picture; you're an integral part of a thoughtfully composed scene.
Answering Your Most Common Posing Questions
Even when you've got the basics down, a few nagging questions always seem to pop up right when the camera comes out. This is where we tackle those common hurdles, offering quick, practical answers to help you iron out any lingering awkwardness and really nail your pose.
Think of this as your quick-reference guide for those little tweaks that make a huge difference. We'll break down how to look more natural, create a taller and slimmer silhouette, and switch up your poses for different occasions.
How Can I Look Natural and Not So Posed?
The secret to looking natural is surprisingly simple: stop trying to hold a pose. Instead, think about creating subtle, continuous movement. A truly great photo rarely comes from standing perfectly still; it captures a moment that feels genuine and unforced.
So, instead of planting your feet and freezing up, try gently shifting your weight from one foot to the other. You could also try walking very slowly toward the camera or just interacting with something in your environment. Adjust the cuff on your jacket, run a hand through your hair, or even just think of a genuinely funny memory to bring out a real smile.
The classic "contrapposto" stance, where you shift most of your weight onto one leg, is a go-to for a reason—it instantly mimics how we stand naturally when talking to someone. It’s an immediate fix for looking too stiff.
Ultimately, the best trick is to focus on the emotion you want to project. Want to look confident? Think about a time you felt really proud. Want to look happy? Recall a joyful moment. This internal focus translates directly into more authentic body language, turning a rigid pose into a portrait with personality.
What Are the Best Standing Poses to Look Taller and Slimmer?
Creating a longer, more streamlined look in photos is all about understanding angles and creating smart visual lines. You don't need to be a professional model to learn a few reliable techniques that work together to create a really flattering effect.
First off, the camera angle itself is a game-changer. Having the camera positioned slightly lower and angled up at you will instantly add a feeling of height. It’s a simple trick photographers use all the time to make their subjects look more statuesque.
Next, never face the camera head-on. Turning your body about 45 degrees away from the camera is the golden rule here, as it dramatically narrows your profile. From there, you can really enhance the effect with how you place your legs.
- Cross One Leg in Front: Gently crossing one leg over the other—either at the ankle or calf—creates a long, elegant diagonal line. This naturally draws the eye upward and has a powerful slimming effect.
- Perfect Your Posture: It sounds basic, but it's crucial. Stand tall, pull your shoulders back, and imagine a string is gently lifting you up from the crown of your head. Good posture alone can make you look inches taller.
- Create Negative Space: When you put a hand on your hip, make sure there’s a visible gap between your arm and your torso. This little bit of "negative space" is key for defining your waist and keeping your silhouette from looking boxy.
Are Standing Poses Different for Professional vs. Casual Photos?
Absolutely. While the core principles like good posture and flattering angles always apply, the execution and intention behind the pose shift dramatically depending on the context. Your pose should always match what the photo is for.
For professional photos—think LinkedIn or a corporate website—the goal is to look confident, capable, and approachable. The poses here are more structured and deliberate.
- Common Professional Poses: A slight three-quarter turn to the camera, a relaxed arm cross, or one hand casually in a pocket are all strong choices. Expressions are typically warm but controlled. If you need some ideas, browsing different types of professional headshots can show you how subtle changes convey different professional personas.
For casual photos, like for social media, you have way more creative freedom. These poses can be dynamic, expressive, and even playful. The main goal is to capture your personality and create a sense of genuine connection.
- Common Casual Poses: Leaning against a wall, captured mid-stride while walking, or showing a big, authentic laugh are all fair game here. The body language is far more relaxed, and the expressions are often more candid and emotive.
The bottom line? Tailor your pose to your audience and the platform. A powerful, structured pose is perfect for business, while a relaxed, interactive pose is ideal for showing your personal side.
Feeling ready to get that perfect shot but don't have the time or budget for a photoshoot? BetterPic uses the power of AI to generate studio-quality, photorealistic headshots in under an hour. Choose from over 150 styles, customize your look, and get professional results with a 100% money-back guarantee. Get your AI headshots today.
Related headshot posing guidance resources
Keep exploring this topic with focused resources from the B2C journey.
Primary destination:BetterPic homepage
- Best Poses for Headshots: 8 Essential Angles to Elevate Your Profile
- Headshot Posing tips for capturing your best Professional Image
- Tips on Posing for Professional Headshots to capture your best self
- 10 Professions Where AI Headshots Are Super Beneficial
- 3 Benefits of Professional Headshots for Engineers Career Growth
Save 87%on average on your professional photos.
Whenever, wherever you are.
Get studio-quality, 4K images in a variety of outfits & settings in less than an hour.
Get your headshots nowStart now